Setting Up and Using the Pi Coding Agent
My experience of setting up the Pi coding agent with DeepSeek, installing packages, and using it for side projects and experiments.
📝 摘要
本文介绍了开源终端编码智能体 Pi 的安装、配置和实际使用体验。Pi 采用极简核心 + 扩展包的设计理念,默认仅提供 read、write、edit、bash 四个工具,通过 npm/git 包按需添加功能。作者使用 DeepSeek v4 Pro(xhigh thinking)作为默认模型,配合 DeepSeek v4 Flash 处理轻量任务,并通过 Kimi K2.6 提供图像视觉能力。文中详细介绍了 pi-web-access(网页搜索与内容提取)、pi-codex-goal(长任务目标追踪)、pi-vision-proxy(视觉代理)三个核心扩展包的安装与配置,以及 AGENTS.md 和 APPEND_SYSTEM.md 两层指令体系的使用方法。
核心概念: Pi 是一个"小核心 + 可扩展包"架构的终端编码智能体,适合搭配开源模型用于副项目和实验性任务,以低成本获得灵活的 AI 编码体验。
关键技术栈 / 关键要点:
- 多模型支持 — 支持 DeepSeek、Kimi、Anthropic、OpenAI、Gemini 等多种 AI 提供商,可通过快捷键快速切换
- 扩展包体系 — 通过
pi install安装 npm/git 包,按需添加网页访问、任务追踪、视觉代理等能力 - 两层指令系统 — AGENTS.md 提供项目级上下文,APPEND_SYSTEM.md 定义全局行为规则(优先级更高)
- Session Tree — 支持会话分支与回溯,可在任意节点继续探索不同方案
- 上下文压缩 — 自动和手动(
/compact)压缩旧消息,有效管理上下文窗口 - 自定义扩展 — 可用 TypeScript 编写自定义扩展(如自定义 footer),Pi 启动时自动加载
关键结论 / 实践建议: Pi 最适合作为主力工具(Cursor/Codex)的补充,用于副项目和实验场景;搭配 DeepSeek 等开源模型可大幅降低成本(如 285K URL 抓取仅花费 $1);建议从基础配置开始,按需添加扩展包,保持设置简洁。
I have been using AI coding tools for a while now. At the time of writing this, I am subscribed to both Cursor and OpenAI Codex. They are great at what they do and I use them for most of my main project work.
But over 2 weeks ago, I came across Pi – an open-source terminal coding agent. It has a small core and lets you add features through extensions and packages, instead of packing everything in by default. I liked the idea, so I decided to set it up and see where it fits.
I am still figuring out the right balance, but Pi has already found a place for my side projects and experiments. In this post, I'll share how I installed it, what my setup looks like, and my honest experience so far.
What is Pi?
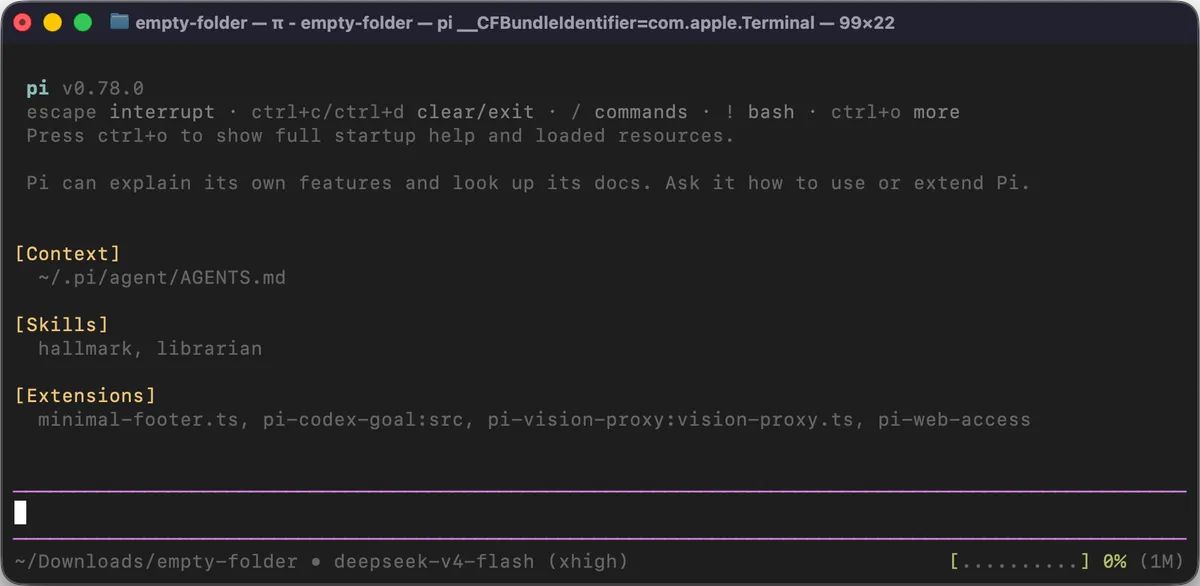
Pi is an open-source terminal coding agent created by Mario Zechner. It works in your terminal and gives the AI model four tools by default – read, write, edit, and bash – to work with your codebase.
There is no built-in plan mode, no sub-agents, no MCP, and no permission popups. Instead, you can add these things through extensions, skills, and packages. This keeps the core small and lets you build exactly the setup you want.
Pi works with many AI providers – Anthropic, OpenAI, DeepSeek, Google Gemini, Groq, xAI, OpenRouter, Kimi, and more. You can use an API key or log in with an existing subscription.
How I use Pi alongside other tools
Right now, I use different tools for different kinds of work:
- OpenAI Codex for complex tasks on my main projects
- Cursor for simpler day-to-day coding on those same projects
- Pi for side projects, experiments, and one-off tasks – usually paired with open-source models like DeepSeek and Kimi
Pi feels right for side projects because it's fast, lightweight, and I can use cheaper models without burning through expensive subscriptions.
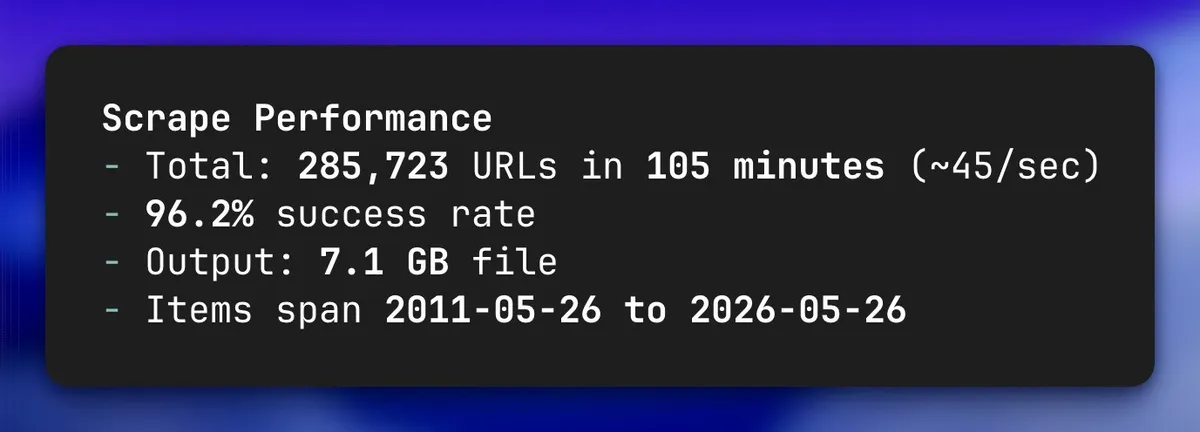
One example: I recently used Pi with the DeepSeek v4 Flash model to scrape 285K URLs from a website. It ran for about 1.5 hours and cost me just $1 through the official DeepSeek API. I used the pi-codex-goal extension to track the long-running task and it worked without issues. You can read more about this on X.
Installing Pi
Installation is one command:
curl -fsSL https://pi.dev/install.sh | sh
Once installed, start it by typing pi in your terminal. But first, you need to set up a provider and API key.
Setting up DeepSeek as the provider
Pi has a built-in /login command that makes setting up any provider easy. Here is what I did:
- Opened Pi by typing
piin the terminal - Typed
/loginand chose Use an API key - Selected DeepSeek from the providers list
- Entered my DeepSeek API key when asked
That's it. Pi saves the key and you're ready to go. After logging in, use /model to pick your model – I chose deepseek-v4-pro with xhigh thinking.
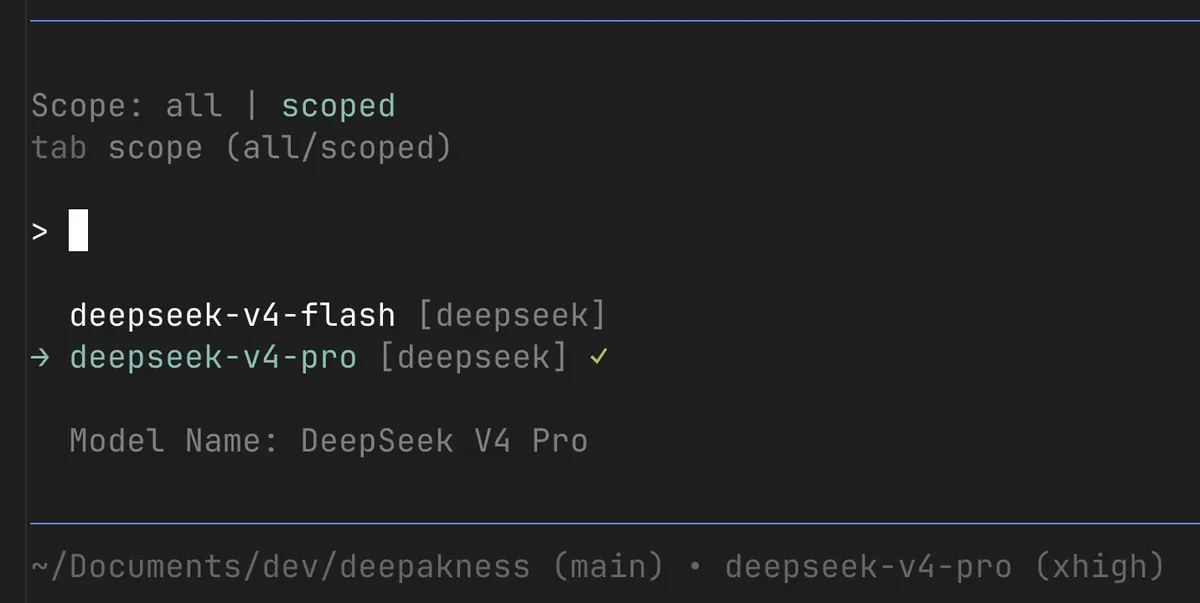
I default to xhigh thinking because I want the model to think deeply before making changes. For lighter tasks like the URL scraping, I switch to the faster and even cheaper deepseek-v4-flash model.
You can open the model picker with Ctrl+L, cycle through your scoped models with Ctrl+P, and change the thinking level with Shift+Tab.
I also sometimes use the Kimi For Coding model through Pi, which has been working well. I like that I can try different models without changing tools.
The interface and my custom footer
When you open Pi, the interface is clean. The editor is at the bottom, the conversation in the middle, and the footer shows your working directory, git branch, current model, thinking level, and context window usage.
One thing I customized early on was the footer. The default footer shows more information than I need. So I asked Pi itself to build me a custom minimal footer. I described what I wanted – current folder, git branch with a dirty marker, model name, thinking level, and a compact context bar – and it wrote the TypeScript extension for me.

The extension lives at ~/.pi/agent/extensions/minimal-footer.ts and Pi loads it automatically on every startup. It was a small change but it made the experience feel personal. I also learned a bit about how Pi extensions work in the process.
Packages I installed
Pi packages are npm or git packages that bundle extensions, skills, prompts, and themes. You install them with pi install. Here are the ones I use:
1. pi-web-access
This package gives Pi the ability to search the web, fetch page content, extract YouTube video transcripts, and explore GitHub repos. You can find it at pi.dev/packages/pi-web-access.
pi install npm:pi-web-access
It works out of the box with Exa search (no API key needed), and you can optionally add API keys for Perplexity, Exa, or Gemini for more control. I configured it to use Exa as the default search provider by creating a ~/.pi/web-search.json file:
{
  "provider": "exa",
  "summaryModel": "deepseek/deepseek-v4-flash",
  "workflow": "none"
}
With this package, Pi can search the web, read documentation, understand YouTube videos, and clone and explore GitHub repositories – all without leaving the terminal.
2. pi-codex-goal
This package adds goal tracking to Pi. It's built by Mitch Fultz. It gives the model three new tools – get_goal, create_goal, and update_goal – that let you create long-running tasks and track progress.
pi install npm:pi-codex-goal
I use this whenever I have a bigger task that spans multiple prompts. Instead of repeating the context each time, I create a goal once and Pi keeps track of what needs to be done. It was especially useful during the 285K URL scraping task – the goal kept the task on track even when the session got long.
3. pi-vision-proxy
DeepSeek cannot look at images – it has no vision capabilities. The pi-vision-proxy package fixes that by proxying images to another model that does have vision.
pi install npm:pi-vision-proxy
I have set up Kimi K2.6 as my vision model. Now, whenever I paste an image into Pi, it sends the image to Kimi with some context, and then DeepSeek uses what Kimi saw to finish the task. It works well for the occasional screenshot or design reference I throw at it. You can read more about this setup on X, and I also have a short video in the X post as well.
Project instructions with AGENTS.md and APPEND_SYSTEM.md
Pi has two ways to give the model instructions: AGENTS.md for project-specific context, and APPEND_SYSTEM.md for global behavioral rules.
AGENTS.md (project context)
Pi loads AGENTS.md files at startup and injects them into the system prompt. There are three discovery locations – a global one at ~/.pi/agent/AGENTS.md, then parent directories walking up, and finally the current directory – and they're all concatenated together.
I keep my global AGENTS.md minimal. It only describes what stack I typically work with:
# Global Pi Instructions

- Projects commonly use Laravel (PHP/Inertia/React), Next.js
  (TypeScript/Tailwind), or Astro. Check the project-root AGENTS.md for
  stack-specific rules – if none exists, ask.
The "if none exists, ask" part is important. When I'm working in a plain HTML/CSS/JS folder or some other stack, the agent doesn't force a framework on me – it just asks.
Most of my projects also have their own AGENTS.md with framework-specific rules, but I rarely write them by hand. They're generated by the framework tooling (like Laravel Boost) with the exact package versions and conventions for that project.
APPEND_SYSTEM.md (global behavioral rules)
AGENTS.md is for project context, but some rules apply across every project regardless of stack. That's where APPEND_SYSTEM.md comes in. It lives at ~/.pi/agent/APPEND_SYSTEM.md and gets appended directly to the system prompt – which means these rules carry higher authority than AGENTS.md instructions.
Here's what I put in mine:
- If the default provider doesn't have vision capabilities, use
  pi-vision-proxy for images.
- Read relevant local files first when the answer is available in the
  codebase. If not, research online via pi-web-access. Before making a
  big change based on online research findings, confirm with me first.
- Explain risky file edits and destructive commands before executing.
- Write simply. Avoid AI-slop language – no flowery adjectives,
  unnecessary adverbs, or overly formal phrasing.
- Use en dashes (–) not em dashes (—).
A few notes on these rules:
- The vision proxy rule is now provider-agnostic. I might use Kimi, DeepSeek, or another model as my default, so instead of hardcoding a provider name, it checks whether the current model has vision capabilities.
- The second rule is more explicit than my earlier version. Instead of just saying "don't search for things you already know", it tells the agent to read local files first, search online only when needed, and confirm before making big changes based on online research.
- The en dash rule is a simple mechanical preference that keeps my writing style consistent across all sessions.
Keyboard shortcuts and commands I use
Pi has many shortcuts. Here are the ones I use regularly:
| Key | What it does |
|---|---|
Ctrl+L |
Open the model selector |
Ctrl+P |
Cycle through scoped models |
Shift+Tab |
Change thinking level |
Ctrl+C (twice) |
Quit Pi |
Escape |
Cancel or abort the current action |
Enter |
Send as a steering message (interrupts current work) |
Alt+Enter |
Send as a follow-up message (delivered after work finishes) |
The difference between Enter and Alt+Enter took some time to get used to. If I want Pi to change direction mid-work, I press Enter. If I just want to add a note for after it finishes, I use Alt+Enter.
And these are the commands I use, often by typing / in the editor:
/model– Switch models without remembering the shortcut/settings– Change thinking level, theme, and other settings/resume– Pick up from a previous session/new– Start a fresh session/tree– See the full session history and jump to any point/compact– Summarize old messages to free up context/session– Show current session info like tokens and cost
The /tree command is especially useful. You can see your entire conversation history like a tree, jump to any branch, and continue from there. It's great when you want to try a different approach without losing what you had before. I got very curious about it after coming across this shared Pi session from Dillon Mulroy. I later wrote down everything I learned from that session in my raw notes.
A few things I learned while using Pi
Long sessions fill up the context window. Pi has automatic compaction that summarizes older messages when you're running out of space. You can also do it manually with /compact. And I love the pi --continue command, that directly opens the last chat in the repo/folder.
Another thing I like is the steering system. While Pi is working (running bash commands, editing files, etc.), you can type a new message and press Enter. This queues a steering message that gets delivered after the current tool finishes. I use this when I notice Pi going in the wrong direction mid-work and want to correct it quickly. Sometimes, instead of a steering message, I also do Option+Enter that sends the message after previous output is completely finished generating.
While I don't use it, you can use your Codex subscription inside Pi, Cursor subscription via this SDK, 100s of models via OpenRouter, xAI, Claude and many more providers via API.
Things I like about Pi
After using Pi for a few weeks, here's what stands out:
- Simple and fast: The terminal interface is snappy. No Electron, no UI lag.
- Customizable: I built the exact footer I wanted, picked the packages I need, and the rest stays minimal.
- Works with any provider: I use DeepSeek and Kimi regularly, and switching between them is one shortcut away. I also learn a lot when using it – you get closer to how things actually work, unlike more polished tools where everything is hidden.
- Session tree is brilliant: Being able to branch conversations and go back to any point is something I miss when using other tools.
- Open source (MIT): I like that no company decides what features I get or how much I pay.
- Compaction just works: I don't think about context limits. Pi handles it in the background, and faster and better than others.
Final thoughts
I am still using Cursor and Codex for my main project work, and I don't see that changing anytime soon. They are polished tools that do their jobs well.
But Pi has earned a permanent place for my side projects and experiments. It's fast, it's cheap (especially with open-source models), and the combination of Pi + DeepSeek + a few well-chosen packages has been solid so far.
Here's what my current setup looks like:
- DeepSeek v4 Pro with
xhighthinking (default) - DeepSeek v4 Flash for lighter tasks
- Kimi For Coding as an alternative model
- pi-web-access for web search and content extraction
- pi-codex-goal for tracking longer tasks
- pi-vision-proxy to handle images via Kimi K2.6
- A custom minimal footer extension
That's it. I tried more packages but kept only what I actually use.
If you are comfortable in the terminal and like the idea of a minimal, extensible agent, give Pi a try. Start with the basics and add packages as you feel the need.
I have been using Pi for a few weeks now and the setup is stable. I uninstalled a few extensions that didn't add enough value. The simpler the setup, the better.
I will keep updating this post as I discover new things about Pi.